Prerequisites
Following configuration is required for installing Ephesoft Transact on Linux machine using command line Single script Linux installer:
- RedHat 6.8 or Ubuntu 13.10 OS (Installer is specifically built and tested on RedHat v 6.8 and Ubuntu v 13.10).
- Make sure that sudo apt-get update and sudo apt-get upgrade have been run before running the installer.
- Internet connection is required as some software need to be updated or installed from OS’s repository during Transact’s installation.
- Executeble permission must be given to all files present in installer folder by executing following command.
- Navigate to installer directory by executing cd /path to installer
- sudo chmod –R 755 *
- Installation script must be run with super user permissions otherwise user will get an error message and script will exit (use root user in case of Redhat and sudo user in case of Ubuntu).
- Ephesoft Transact license must be installed in order to use Transact.
- Installer is specifically built for Ephesoft Transact v4.0.0.0 and currently supports MariaDB/MySQL database as MSSQL database can not be installed on Linux.
- SharedFolders must be configured on network using Samba server file sharing. Scripts doesn’t handles this automatically.
- SharedFolders path must be same on all the servers in multiserver cluster beacuse Linux doesn’t understand network paths in manner that windows does. Hence in order to use SharedFolders on network user will have to create a Samba share of installed SharedFolders on one of the machine e.g. user has SharedFolders locally on /opt/SharedFolders on the first machine in cluster. User will have to share this folder using Samba share. In order to configure same shared folders on other Linux machines in multicluster environment an empty folder will be created on machine being configured at same location i.e. /opt/SharedFolders by the installer (shared folders path must be same on all machines in multiserver cluster) and this empty folder will act as mount point for the Samba Share network path.
- Makes sure that the server name configured in the dcma-batch.properties is also listed in the /etc/hosts file.
Installation Steps
This guide explains steps to install Ephesoft Transact on two Linux servers. Database and SharedFolders will be installed on server-1 and server-2 will use the database and SharedFolders installed on server-1. First install Ephesoft on Server-1. Please follow the step by step installation of Ephesoft Transact on RedHat 6.5 or Ubuntu 13.10 operating system through single script Linux installer (This document takes example of RedHat OS):
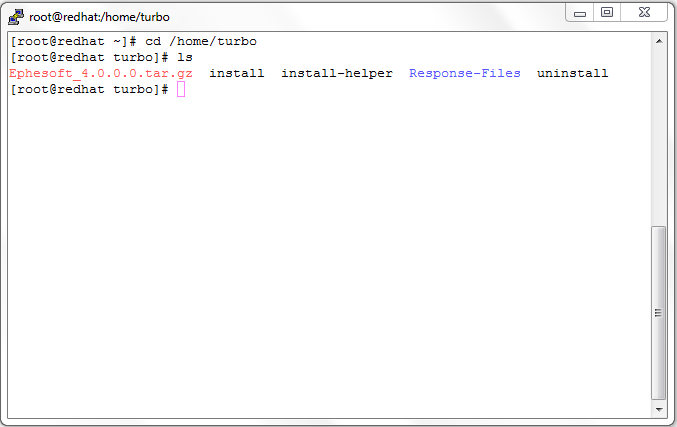
- Copy the Ephesoft_4.0.0.0.tar.gz, Response-Files directory and installation scripts to some path using WINSCP or any other tool. As shown in the below example all the required files have been copied to /home/turbo directory.
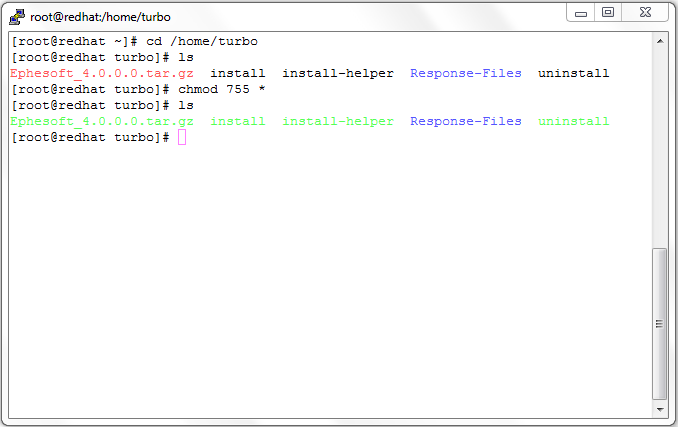
- In order to execute the scripts, give appropriate permission for executing the scripts using the command “chmod 755 * “.
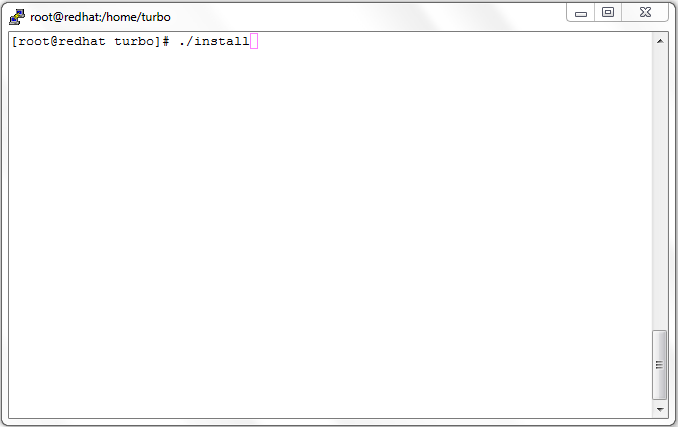
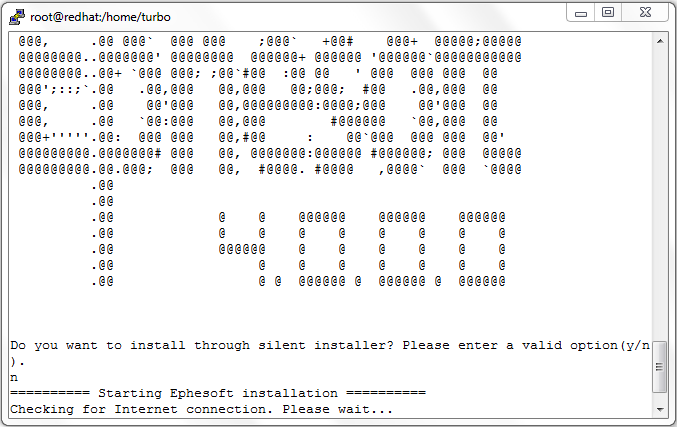
- Now, proceed with the fresh installation of Ephesoft Transact on Linux operating system (RedHat or Ubuntu). Run the installation script using command “./install”. The script must be run as a super user. Installation will be interrupted if script is not run with super user permission.
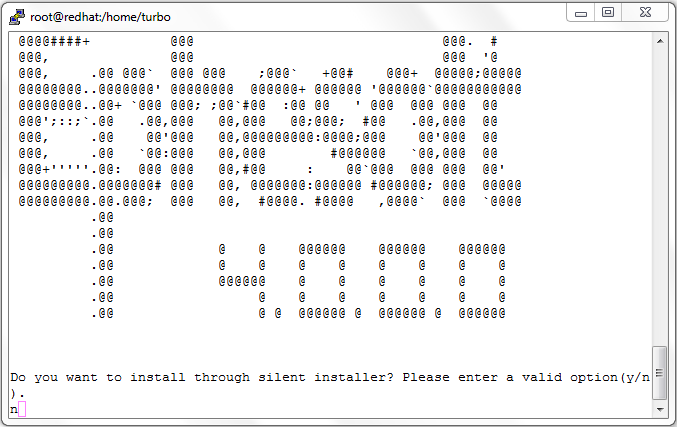
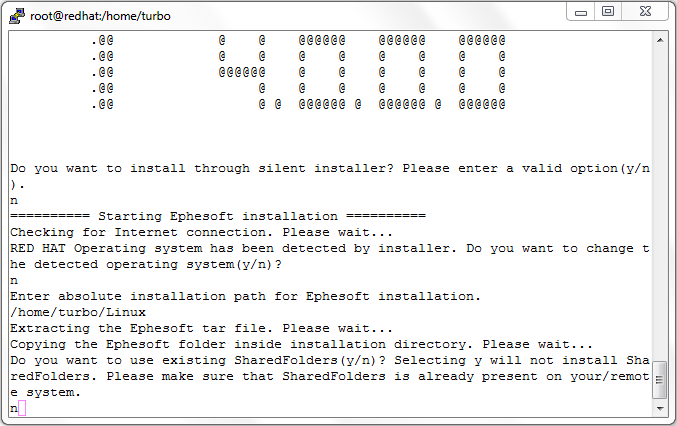
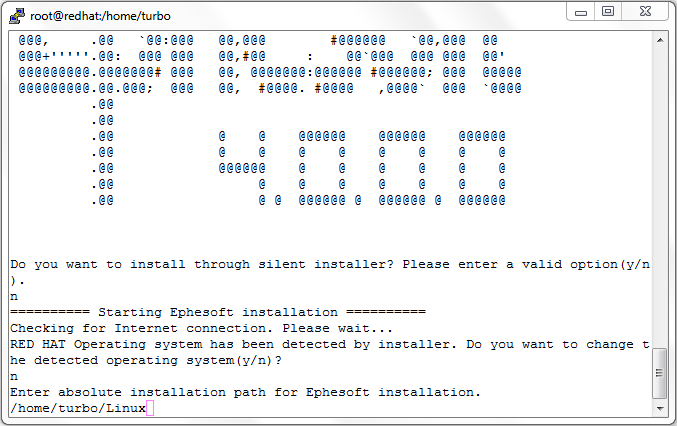
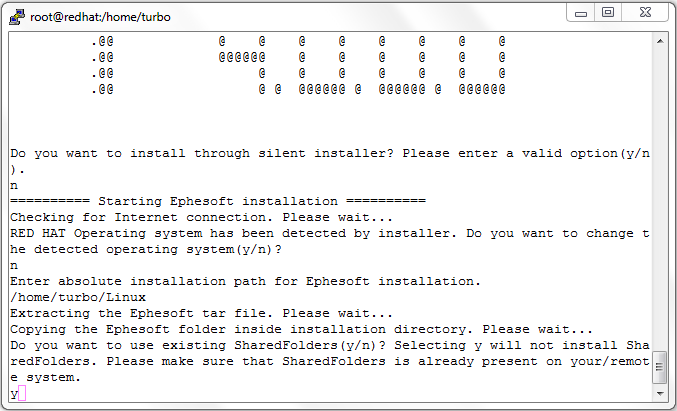
- Ephesoft Transact installation will start and first installer will ask if user wants to run installer as a silent installer or not. By default “n” option will be displayed on terminal as shown in the below snapshot:
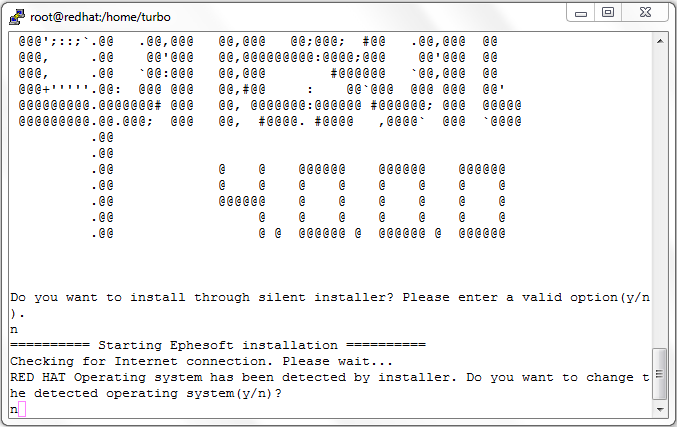
- Then installer will check for the internet connection availability. Installation will be interrupted if no internet connection is available as some of the software requires update or installation from OS’s repository during Ephesoft Transact installation.
- Installer will identify system as Red Hat where user can also change the operating system if installer identifies wrong operating system. By default “n” option will be displayed on the terminal as shown in the below snapshot:
- Installer will ask for the path where user wants to install the Ephesoft Transact application.
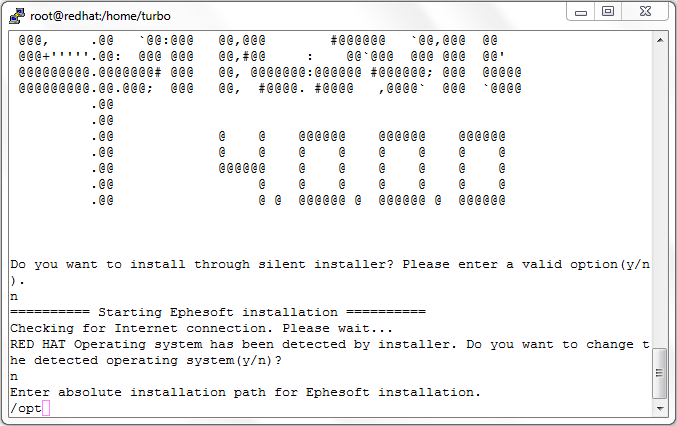
- By default installer will install the Ephesoft Transact application inside “opt” directory. User has an option to change the path manually. Installation path can be changed for Ephesoft Transact application as shown in the below snapshot:

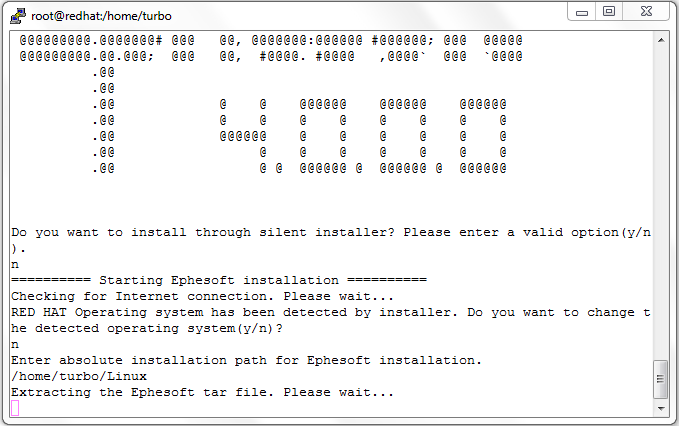
- Now, installation script will extract the Ephesoft_4.0.0.0.tar.gz file inside the defined directory and tar file extraction may take some time as shown in the below screenshot:
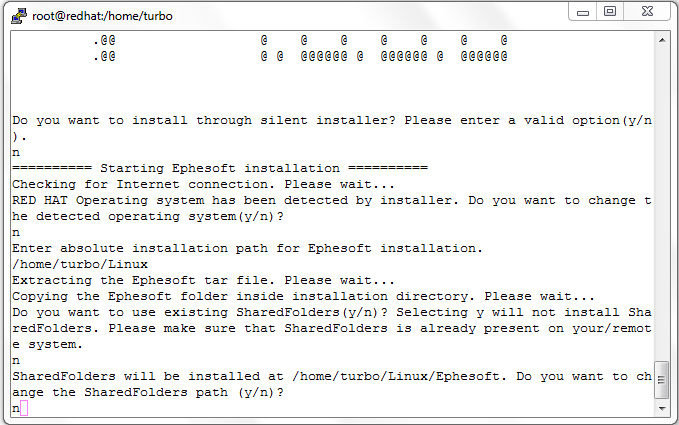
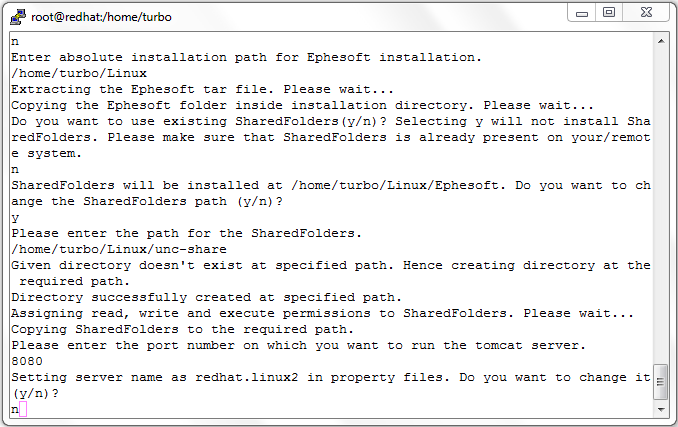
- Once the tar file extraction completes, Ephesoft Transact application is copied to the desired directory. Now, installer will ask whether user wants to use existing SharedFolders or new SharedFolders. By default “n” option will be displayed on terminal as shown in the below snapshot:
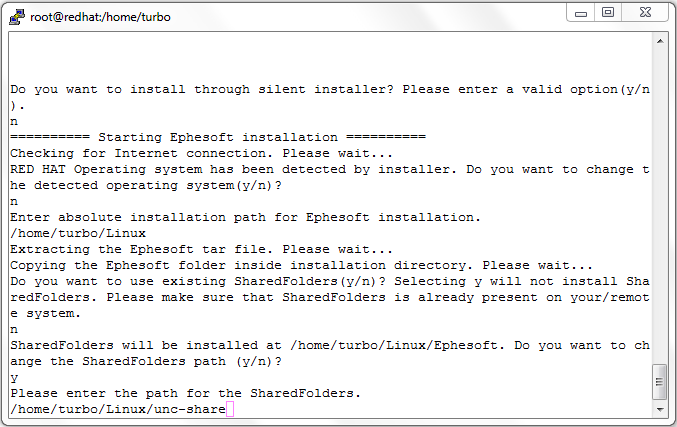
- SharedFolders will be installed inside Ephesoft Transact directory by default (For example in this case SharedFolders will be installed inside /home/turbo/Linux/Ephesoft/SharedFolders). User has an option to change the SharedFolders path in case if one wants to install SharedFolders at some other location.
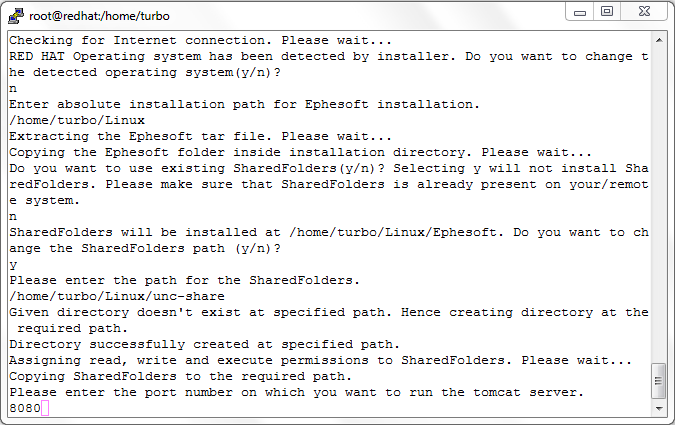
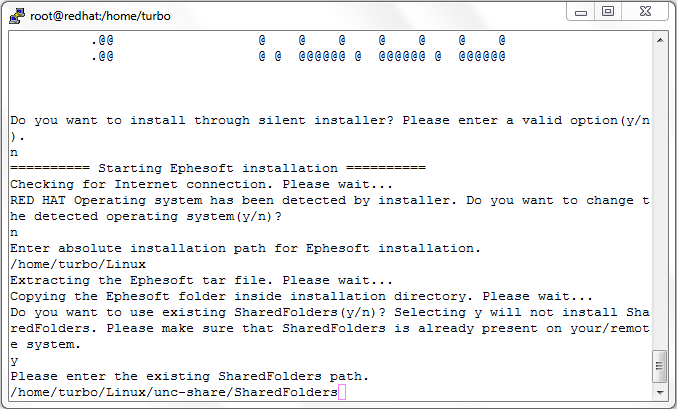
- Selecting “y” option will install the SharedFolders at user defined path. For example in this case SharedFolders will be installed inside /home/turbo/Linux/unc-share directory as shown in the below snapshot:
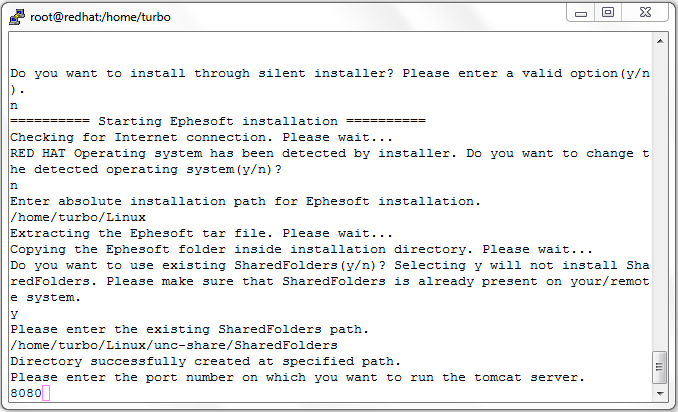
- After successful installation of SharedFolders, installer will ask for the port number on which the tomcat server is to be run. By default tomcat will be run on 8080 port number. User can manually change the port number as desired.
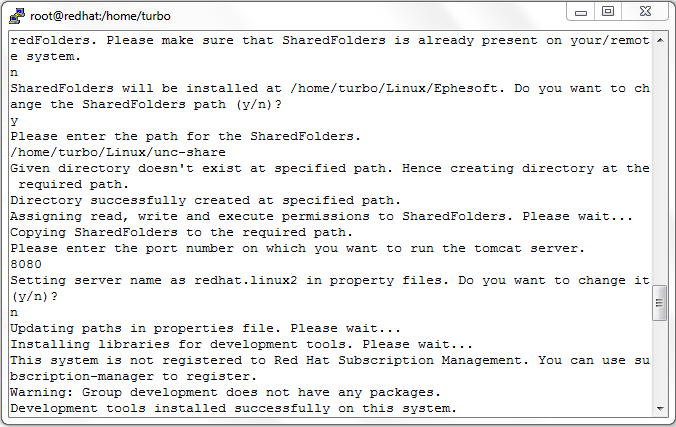
- Now, installer will ask for the server name. By default, it automatically identifies the hostname and will replace the server name with hostname in property files. In case if user wants to give IP address, user can manually change the same.
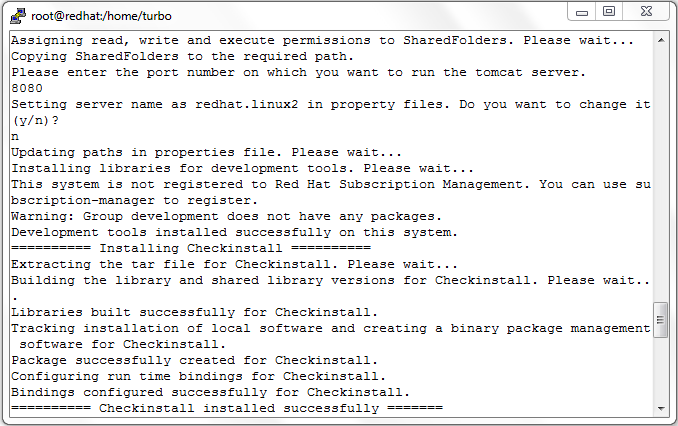
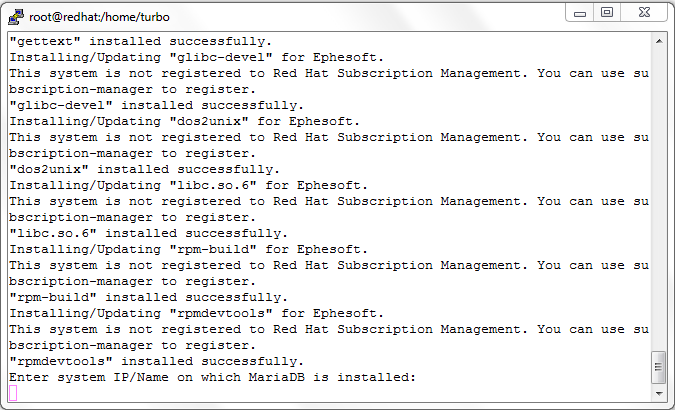
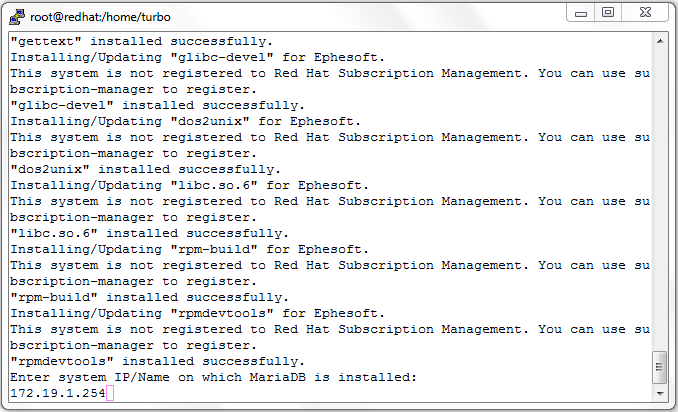
- Now, installer will install the Ephesoft Transact dependencies (development tools) on the system as shown below:
- After successful installation of Development Tools, Installer will install Checkinstall on system. Checkinstall installation will take some time as it will compile and build the libraries as per the operating system.
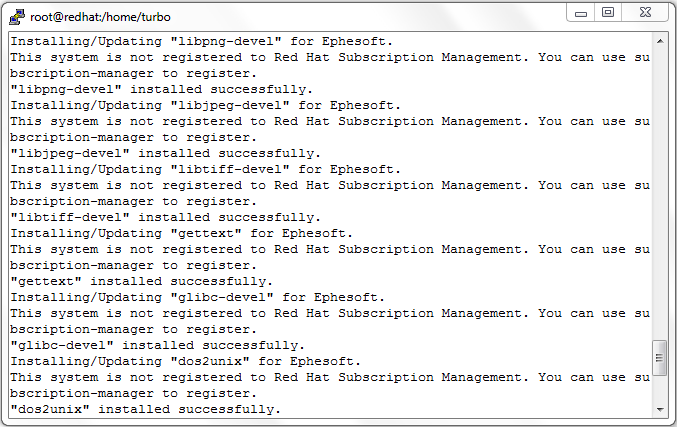
- After successful installation of CheckInstall, Installer will install dependencies from OS repositories on system.
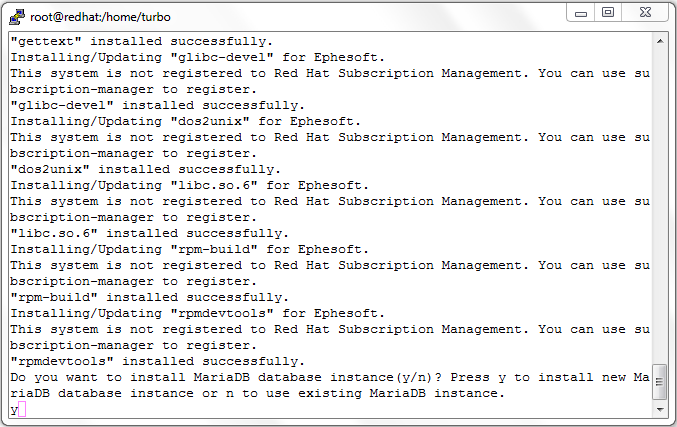
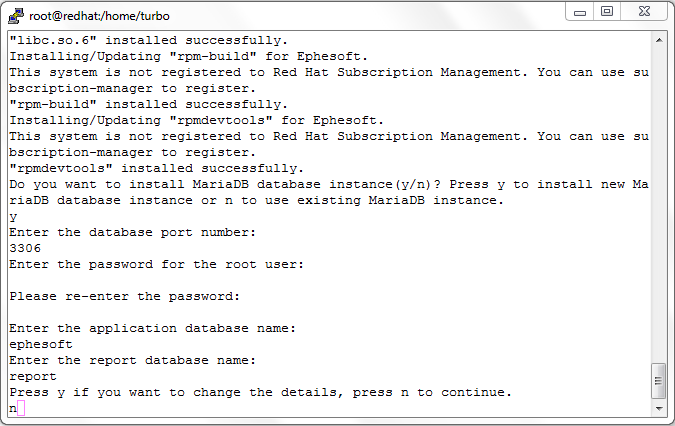
- Now, installer will ask for MariaDB installation whether user wants to use existing MariaDB instance or install a new MariaDB instance.
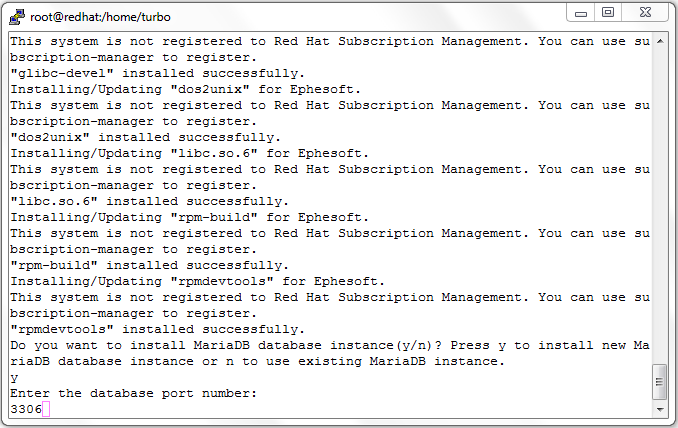
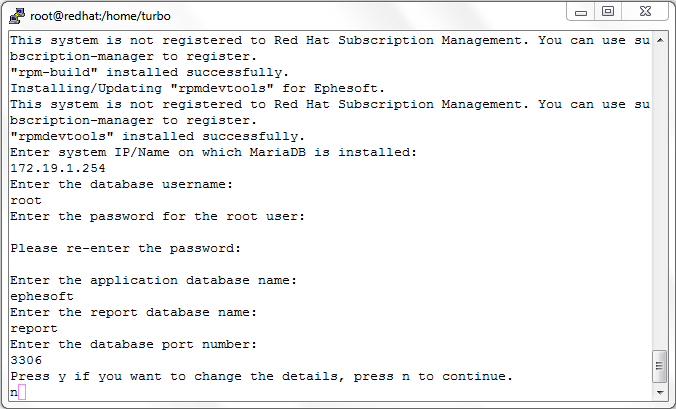
- The example showsfresh installation of MariaDB database instance and assuming that MariaDB is not installed on the system. It will then ask for database required configuration details. Enter the database port number (3306 is the default database port).
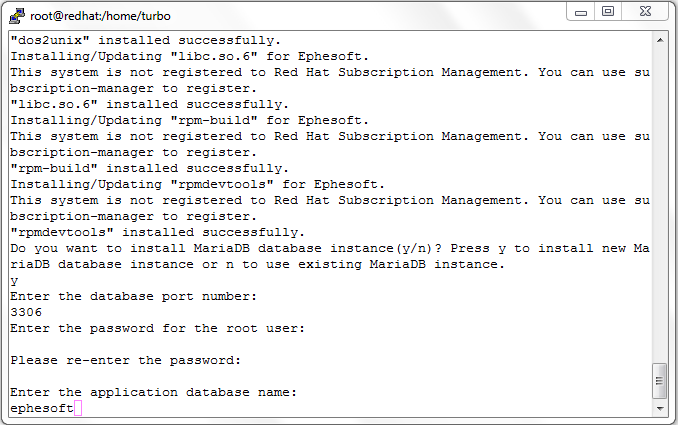
- Enter the root user password and again re-enter the password. Please make sure the password entered is correct. Enter the Ephesoft Transact application database name (ehpesoft is default application DB name).
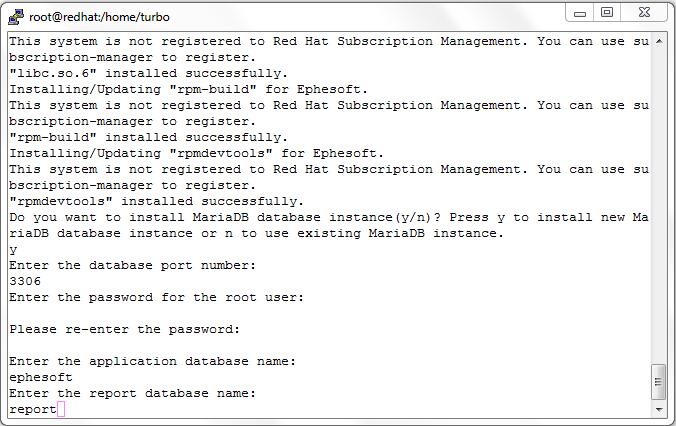
- Enter the report database name (report is default report DB name).
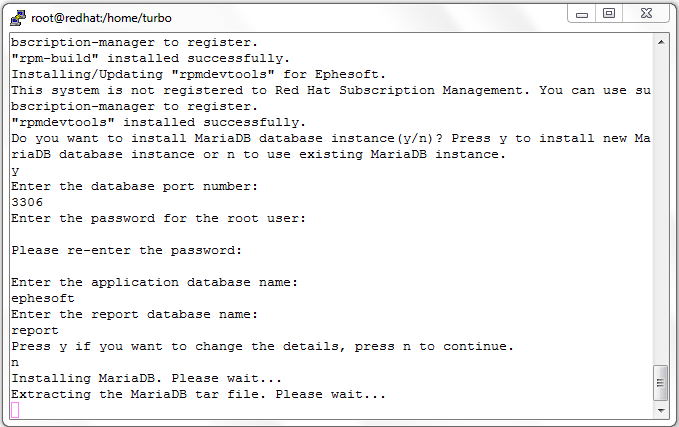
- Confirm that database configuration details entered is correct. If user wants to change the details, press “y” and press “n” for continuing the installation process.
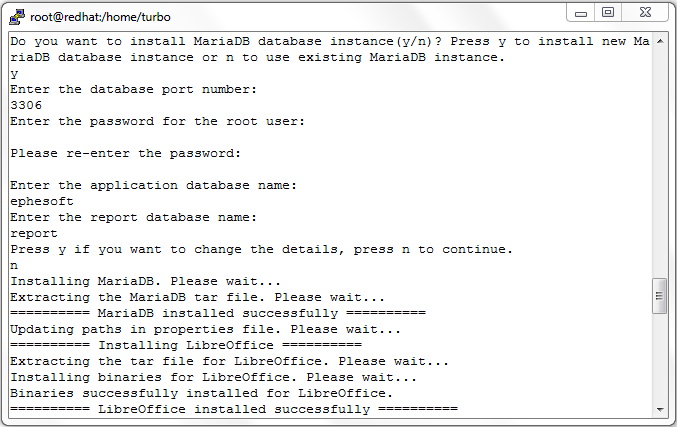
- Installer will now install the MariaDB database. This installation may take some time.
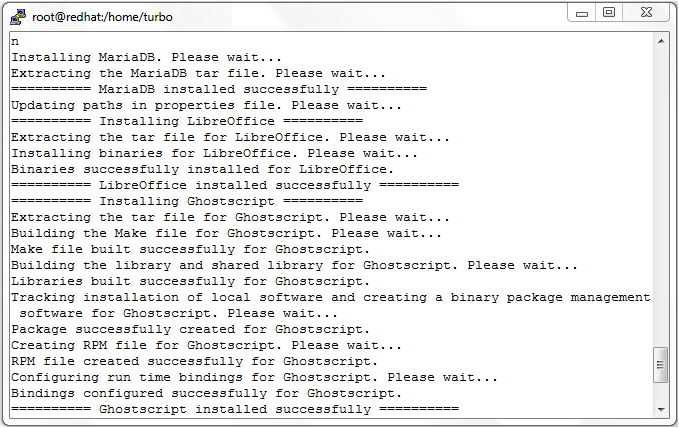
- After successful installation of MariaDB, installer will install Libreoffice on system. Libreoffice installation may take some time.
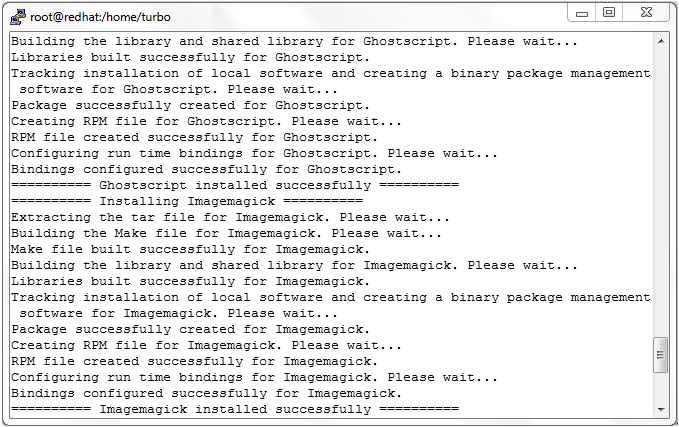
- After successful installation of Libreoffice, installer will install Ghostscript on system. Ghostscript installation may take some time as it will compile and build the libraries as per the operating system.
- After successful installation of Ghostscript, installer will install Imagemagick on system. Imagemagick installation may take some time as it will compile and build the libraries as per the operating system.
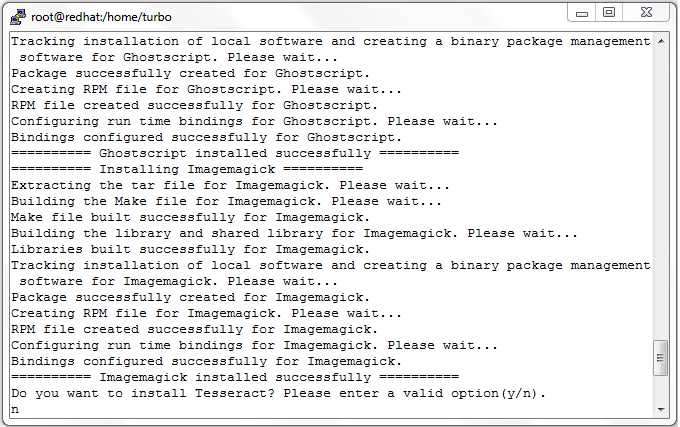
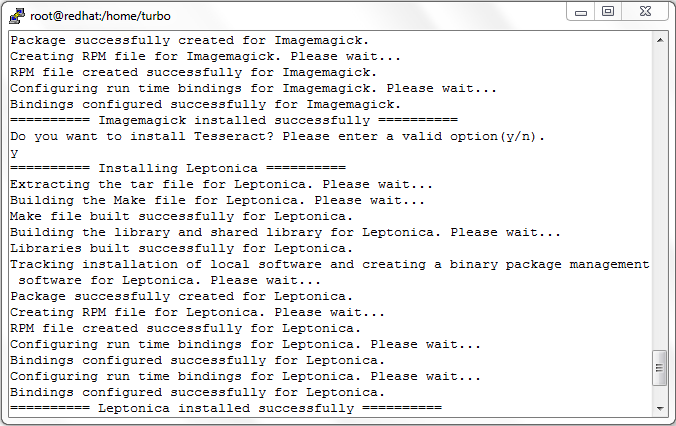
- Once imagemagick is installed successfully on the system, installer will ask whether user wants to install Tesseract or not.
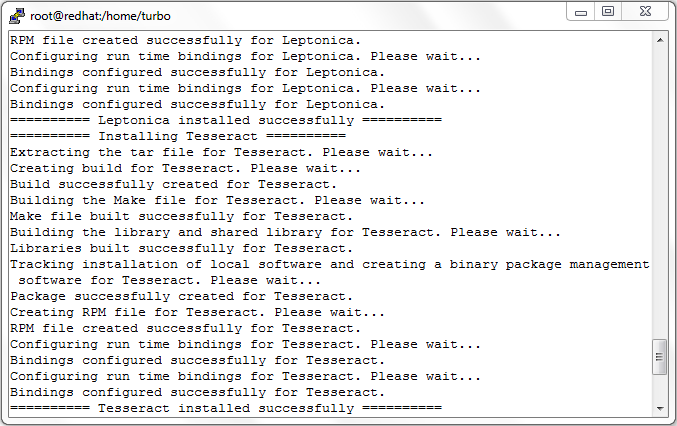
- If user chooses the option “y” then it will install the Leptonica 1.69 required for installing Tesseract on Linux operating system. Leptonica installation may take some time as it compiles and build the libraries as per the operating system.
If user chooses the option “n” then installation of both tesseract and leptonica will be skipped which will save installation time in case the user does not want to use tesseract along with Ephesoft Transact.
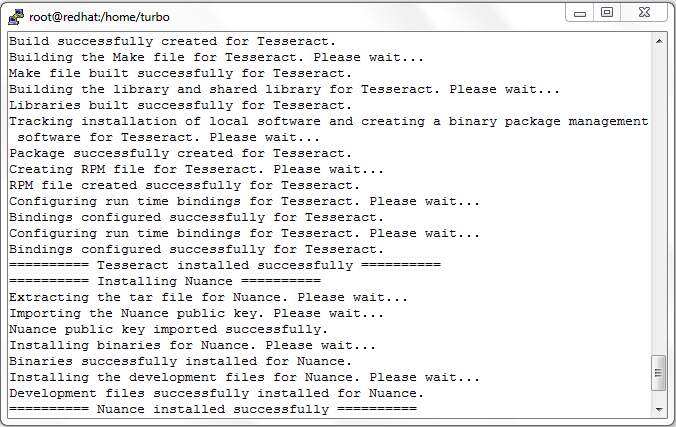
- Now, it will install Tesseract 3.0.1. Tesseract installation may take some time as it compiles and build the libraries as per the operating system.
- Once Tesseract is installed successfully, Installer will install the Nuance on the system. It will install Nuance 18.6.5 on the system. Nuance installation will take some time as it will compile and build the libraries as per the operating system.
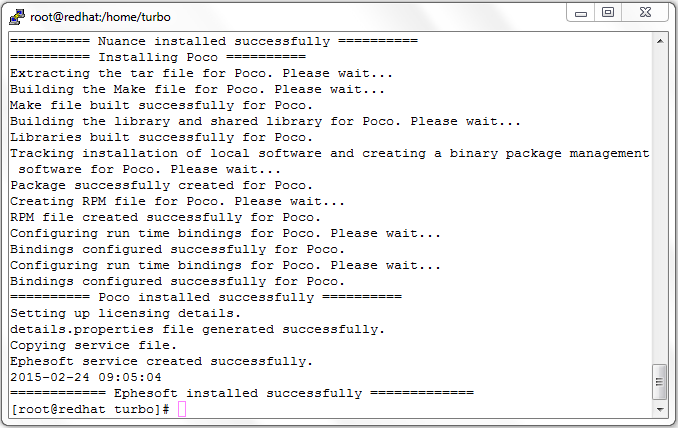
- After successful installation of Nuance. It will install POCO 1.4.6 on the system. POCO installation may take some time as it will compile and build the libraries as per the operating system.

- Once POCO is installed successfully, Ephesoft Transact installation will be completed.
- Go to the licensing directory inside <Ephesoft Transact Installation Directory>/Ephesoft/Dependencies folder and share generated details.properties file with Ephesoft Transact support team to get the license file. If details.properties is not present then, please generate the same by executing ./license-info.
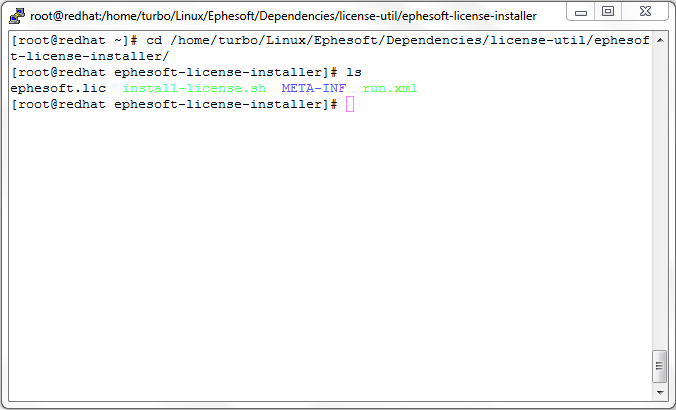
- Now, put the Ephesoft Transact license file (ephesoft.lic) inside <Ephesoft Installation Directory>/Ephesoft/Dependencies/license-util/ephesoft-license-installer.
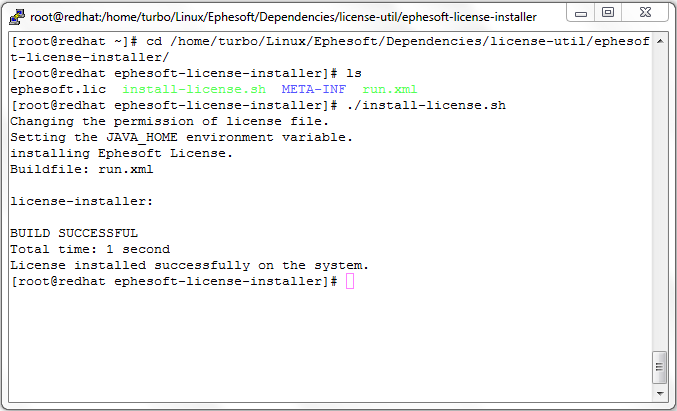
- Run the install-license.sh file using super user permission and your license is successfully installed on the machine. (Make sure Ephesoft server is not running while installing the license)
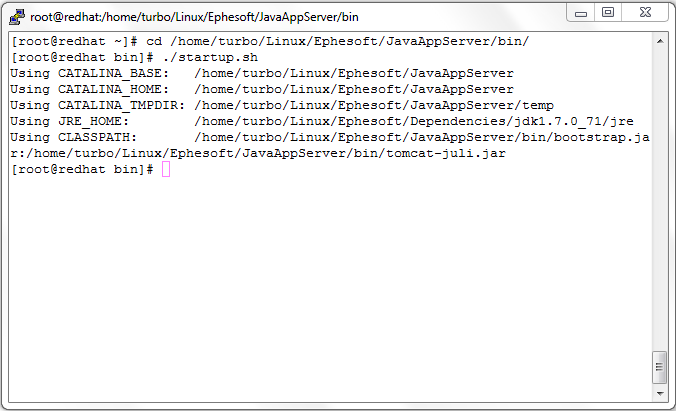
- Now, start the Ephesoft Transact server. For this go inside the bin directory of JavaAppServer placed inside Ephesoft Transact directory.
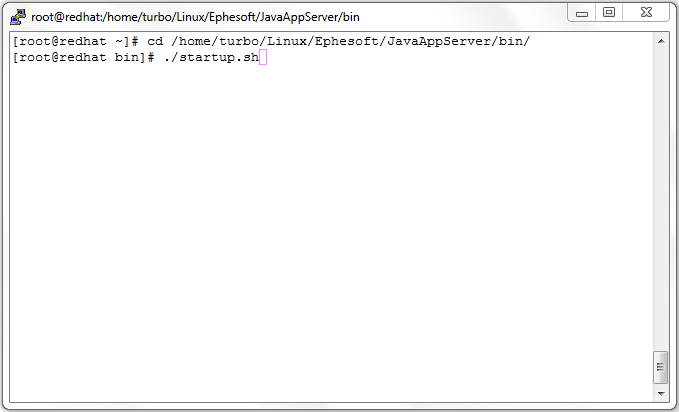
- Now, start the server by running the command “./startup.sh”. It will start the server. This may take some time as data is being populated in the database.
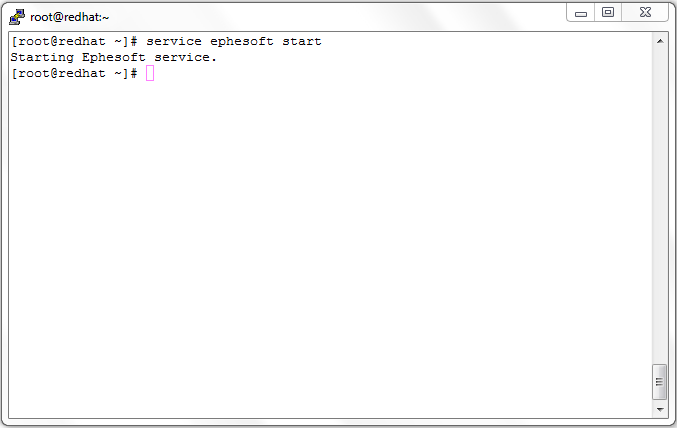
User can also start ephesoft server through ephesoft service by using the command:
service ephesoft start
Note*: Make sure to start Ephesoft Transact using super user permissions as Ephesoft Transact has been installed with super user permissions.
Through service:
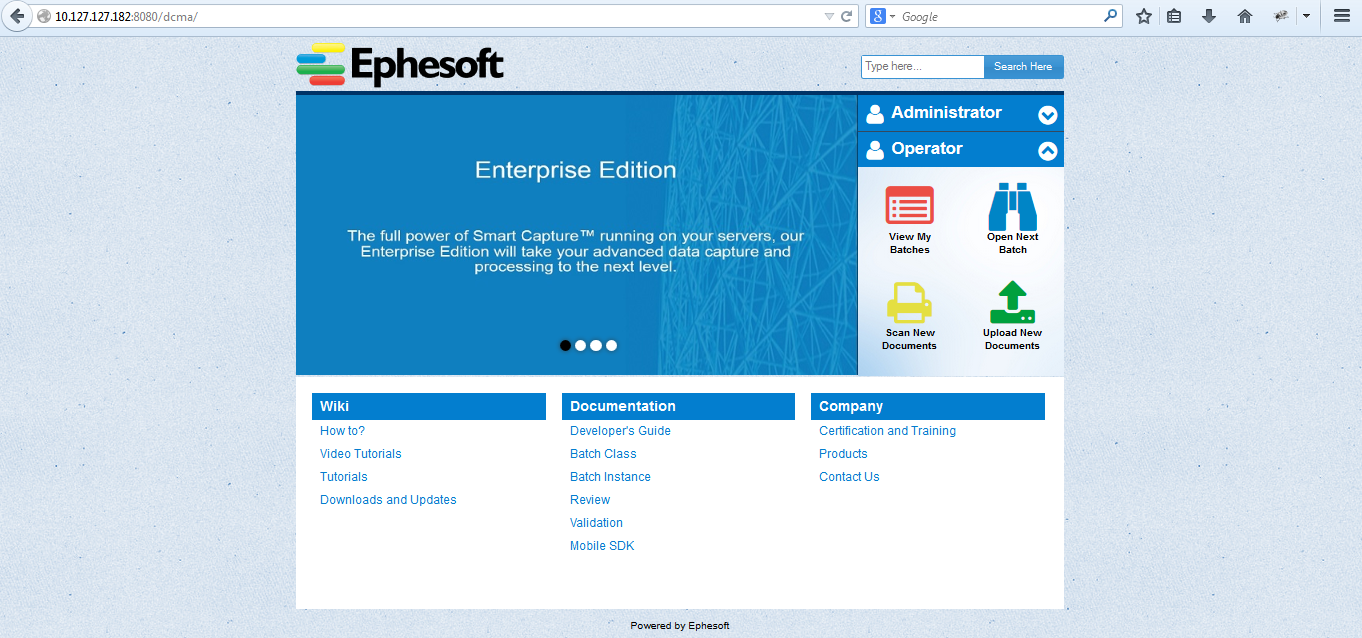
- Now, open browser and hit the application using the following URL:
http://<server name>:<port number>/dcma/home.html
- The following screen will open when server comes to RUNNING state:

- Installing the Ephesoft Transact application on server-2. Please note that Ephesoft Transact application on server-2 will use the SharedFolder deployed on server-1 and will point to the database installed on server-1. Repeat steps 1 to 8 and copy the Ephesoft Transact application to some user configurable path.
- Choose option “y” for installing the SharedFolders since user has to use existing SharedFolders.
- Now, please enter the mounted SharedFolders path. Please note that mounted shared folder path should point to the exact location as that of server-1.
- After successful installation of SharedFolders, installer will ask for the port number on which tomcat server is to be run. By default tomcat will be run on 8080 port number. User can manually change the port number as desired.
- Now, installer will install development tools, checkinstall and other various dependencies. Then user has to enter the database configuration details. User must point it to the same database which server-1 is using. First, it will ask for the system IP on which MariaDB has been installed.
- Enter the database user name, database password, application database name, report database name etc. details. Please make sure that database details entered are correct.
- Enter the database port number and confirm that database configuration details entered is correct. If user wants to change press “y” and press “n” for continuing the installation process.
- Perform the steps from 24 to 32. Now Ephesoft Transact is successfully installed on the server-2. Now mount the SharedFolders on server-2 using samba server manually. Please refer to Samba Share Configuration for Ephesoft Transact in Multi-Cluster environment on REDHAT Linux.docx. Once mount is successful start the server as shown in steps 33, 34, 35, 36.
- Now, open browser and hit the application using the following URL:
http://<server name>:<port number>/dcma/home.html
- Following screen will open when server comes to RUNNING state:
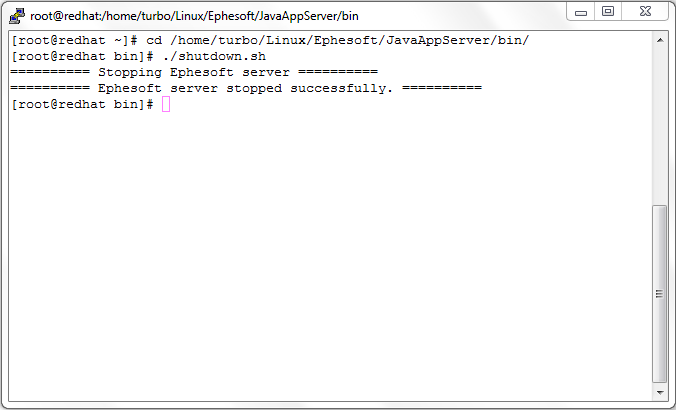
- For shutting down the Ephesoft Transact server, go inside the bin directory of JavaAppServer placed inside Ephesoft Transact directory and run the following command as shown below:
User can also stop Ephesoft Transact server by using Ephesoft Transact service.
service ephesoft stop

Ephesoft Transact v4.1.1.0 Installation on Linux with Oracle Database
User can now perform silent installation of Ephesoft Transact v4.1.1.0 on Linux as a non-root user. Also, Ephesoft Transact v4.1.1.0, supports offline installation in case you do not have internet access on the system where you are performing installation.
Ephesoft Transact v4.1.1.0 also supports Red Hat Enterprise Linux v 6.8.
Earlier, Ephesoft Transact supported the following databases:
-
MySQL
-
Maria DB
Support for Oracle database has been introduced in Ephesoft Transact v4.1.1.0.
You can now install Ephesoft Transact with Oracle database. Oracle database is not shipped with Ephesoft Transact v4.1.1.0 installer. You will be prompted by the installer to enter the credentials needed to connect with an existing Oracle database instance on the system.
Ephesoft Transact supports the following Oracle versions:
-
Oracle 12c
-
Oracle 11.2.0.x
The following changes have made to achieve this:
- Domain Layer: The default naming strategy has been overridden to create tables and columns with shortened names in case of Oracle database. Sequences are created for batch_instance and batch_class id
- Reporting (ETL and Logi info Reports): Separate set of ETL scripts and Logi info reports are maintained for Oracle databse.
- Database Schema and Patch: Oracle-compatible SQL files have been created.
Silent Installation of Ephesoft Transact on Linux
This section describes silent installation of Ephesoft Transact on Linux.
Silent installation allows you to define an installation configuration once and then reuse the configuration to duplicate the installation on many machines. During silent installation, the installer reads the configuration settings from a config.properties file created by you before beginning the installation. The installer does not display any configuration options during the installation process.
config.properties file defines the installation configuration that you would normally enter during an interactive installation process. For example, in config.properties, you can supply the configuration for the installation directory, the shared folder path, and the components to be installed.
Considerations for Silent Installation
You need to consider the following while performing silent installation:
- Silent installation requires the same amount of temporary disk space and uses the same temporary storage directories as standard installation.
- Silent installation requires the same amount of time as standard installation.
- Incorrect entries in the config.properties file can cause installation failures. To help you determine the cause of a failure, the installer validates entries before commencing installation. If there is an incorrect entry, then the installer stops installation and displays the invalid entry.
Editing config.properties File for Customized Installation
The installer uses config.properties file to determine which installation options should be implemented. Before performing silent installation, you must first edit the config.properties file.
To edit the config.properties file
- Locate the config.properties file in Response-Files directory and open it in a text editor.
- Edit values for the parameters in config.properties to reflect configuration.
- Save the updated file with the name config.properties in Response-Files directory.
config.properties Parameters
This section describes the various parameters available in the config.properties file.
| Parameter | Description | |
| input_product_name | Name of product being installed. | |
| input_service_name | Name of service of the product being installed. | |
| input_installation_directory | Installation directory of the product. | |
| input_change_shared_folder_path | n | Enter n to use the default shared folder path. |
| y | Enter y to change the default shared folder path. If you enter y, then shared folder path will be input_changed_shared_folder_path | |
| input_changed_shared_folder_path | The full path for the directory where you want to install SharedFolders. | |
| input_tomcat_port_number | Port number to be used by Tomcat. | |
| input_change_server_name | n | Enter n to use the default server name. |
| y | Enter y to change the default server name. If you enter y, then server name will be input_changed_server_name. | |
| input_changed_server_name | Enter a server name. | |
| input_new_database_instance | y | Enter y to install a new database instance |
| n | Enter n to use an existing database instance. If you enter n, then input_system_ip_name is used a database location. input_database_username is used as the username to login to the database. | |
| input_system_ip_name | IP address of the server on which the existing database is located. | |
| input_database_username | Username to access the existing database instance. | |
| input_database_port_number | Port number for database | |
| input_database_password | Password to access the existing database instance. | |
| input_application_database_name | Enter a database name for Ephesoft Transact application. | |
| input_report_database_name | Enter a database name for Ephesoft Transact reports. | |
| input_install_tesseract | y | Enter y to install tesseract. |
| n | Enter n to skip tesseract installation. The default is n. | |
| input_existing_shared_folder | n | Enter n not to use existing SharedFolders. |
| y | Enter y to use existing SharedFolders. If you enter y, input_existing_shared_folder_path will act as the path for SharedFolders. | |
| input_existing_shared_folder_path | Enter the complete path for the directory where existing SharedFolders are present. | |
| input_database_patch_enable | y | Enter y to execute database path. This is required in case of single server installation or database server in case of multi-server environment. |
| n | Enter n not to execute database patch. | |
| input_upgrade_application | y | Enter y to upgrade from an existing Ephesoft Transact version. Upgrade happens if you have an existing lower upgradable version than the version you want to install. |
| n | Enter n not to upgrade. | |
| input_forcefully_stop_running_server | y | Enter y to stop the Ephesoft Transact server if server is running during the upgrade process. |
| n | Enter n not to stop the Transact server. If server is running, then this will exit the script. | |
| input_install_multiserver | y | Enter y to install the server as multi-server environment. |
| n | Enter n to install the server as single server environment. | |
| input_mounted_sharedfolder_path | Enter the full path for the mounted shared folder. | |
The following parameters have been added to the config.properties file with Ephesoft Transact v4.1.1.0 to support:
-
Offline installation
-
Installation as a non-root user
-
Installation with Oracle database
| Parameter | Description | |||
| input_offline_install_mode | n | Enter n to install in online mode. | ||
| y | Enter y to install in offline mode. | |||
| input_run_application_as_non_root_user | n | Enter n to install as root user. | ||
| y | Enter y to install as non-root user. If you enter y, input_use_existing_user is used to decide if an existing non-root user performs the installation or whether to create a new non-root user. | |||
| input_use_existing_user | n | Enter n to create a new non-root user to perform installation. | ||
| y | Enter y to use an existing non-root user to perform installation. | |||
| input_application_user | Enter username of the non-root user to perform installation. | |||
| input_application_user_password_required | n | Enter n if you do not want to set a password for the user. | ||
| y | Enter y if you want to set a password for the user. | |||
| input_application_user_password | Enter a password for the user. | |||
| input_application_user_group | Enter the user group for the user. | |||
| input_database_type | 1 | Enter 1 if you want to install Transact with MySQL/Maria DB. | ||
| 2 | Enter 2 if you want to install Transact with Oracle database. If you enter 2, input_new_database_schema is used to decide if an existing database schema is used or a new one is created. | |||
| input_new_database_schema | n | Enter n to use an existing database schema. | ||
| y | Enter y to create a new database schema. | |||
| input_oracle_database_username | Enter username of a user to access the Oracle database.
|
|||
| input_oracle_database_password | Enter the password for the Oracle database user (input_oracle_database_username). | |||
| input_oracle_database_server_name | Enter name of the server where Oracle database is located. | |||
| input_oracle_database_port_number | Enter Oracle database port number. | |||
| input_oracle_database_sid_service | Enter Oracle SID service name. | |||
| input_oracle_database_application_db_schema | Enter Oracle database Transact application username. | |||
| input_oracle_database_application_db_password | Enter Oracle database Transact application user password. | |||
| input_oracle_database_report_db_schema | Enter Oracle database Transact report username. | |||
| input_oracle_database_report_db_password | Enter Oracle database Transact report user password. | |||
| input_oracle_database_report_archive_db_schema | Oracle database Transact report archive username. | |||
| input_oracle_database_report_archive_db_password | Oracle database Transact report archive user password. | |||
Configuring Silent Installer as Custom Installer
Silent Installer can also be configured as custom installer. In custom installer, Linux administrator can create preprocessing and post processing script.
In pre/post processing script, user can populate the config.properties file, and execute the silent install script command as background process.
For example, Linux administrator can use following script to install Transact in background silently:
Using the above script, you can check if the process is finished via $pid or using installation.log which is created in the present working directory as soon as silent installation process is finished.
In case of successful installation, the installation_status property is set as success. In case of an error or exception, this property is set as failure in log file with the corresponding error message.
Performing Silent Mode Installation/Uninstallation
This section describes how to perform silent installation/uninstallation.
Installing Ephesoft Transact v4.1.1.0
To install Transact in silent mode
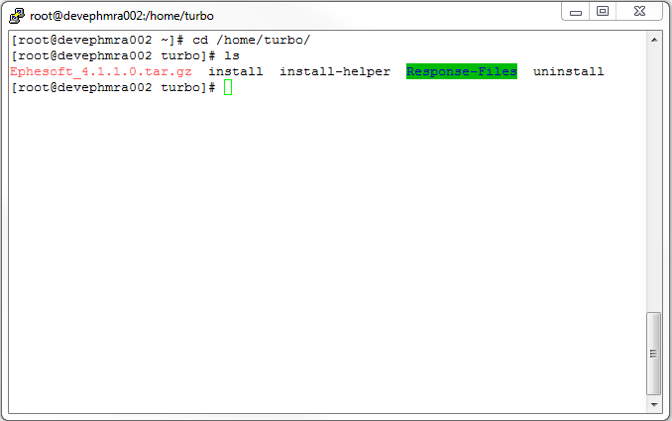
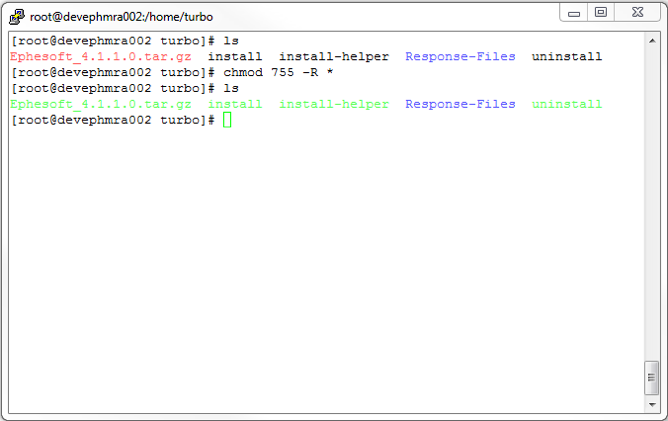
- Copy the Ephesoft_4.1.1.0.tar.gz, Response-Files directory and installation scripts to some path using WINSCP or any other tool.
In the below example, all the required files have been copied to/home/turbo directory.
- Edit the config.properties file present in Response-Files directory to define the configuration settings you would normally enter during an interactive installation process, such as console-mode installation.
 3.Use the command chmod 755 -R * to grant appropriate permissions to execute the scripts.
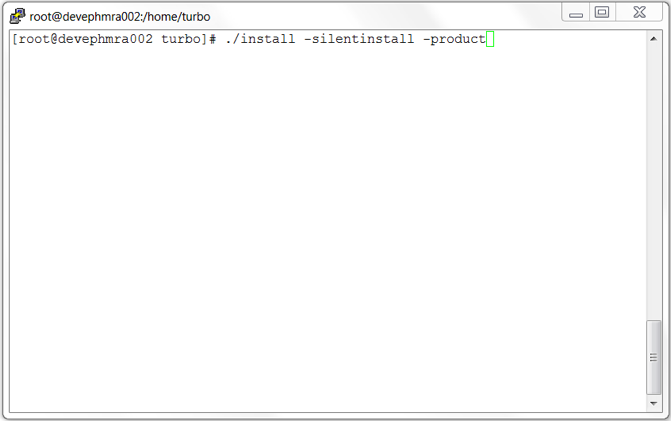
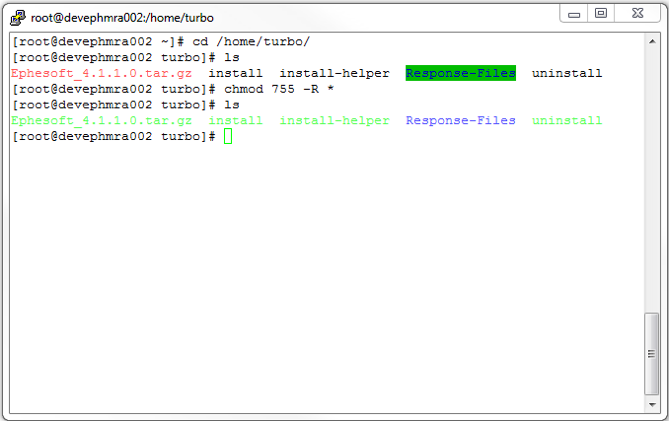 4. Use the command ./install –silentinstall –product to initiate installation on Linux operating system (RedHat or Ubuntu)
5. OR Use the command ./install -silentinstall to install Ephesoft Transact in silent mode
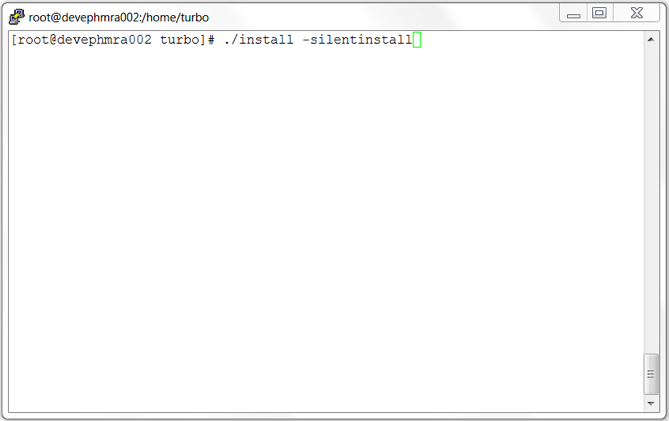
 The installer initiates silent installation of Transact.
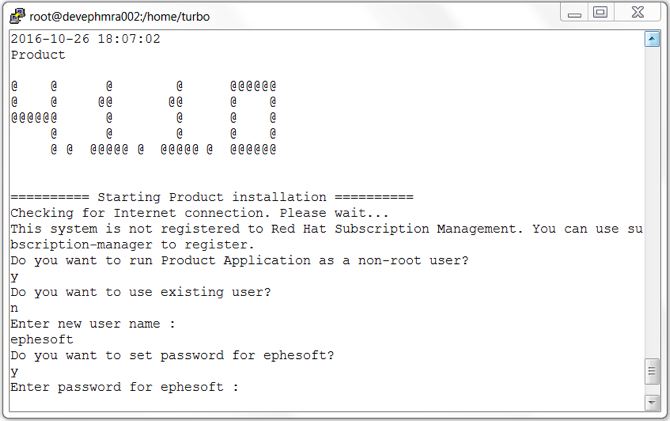
5. Use the command ./install –silentinstall –product to initiate installation on Linux operating system (RedHat or Ubuntu).
 The installer initiates silent installation of Ephesoft Transact.

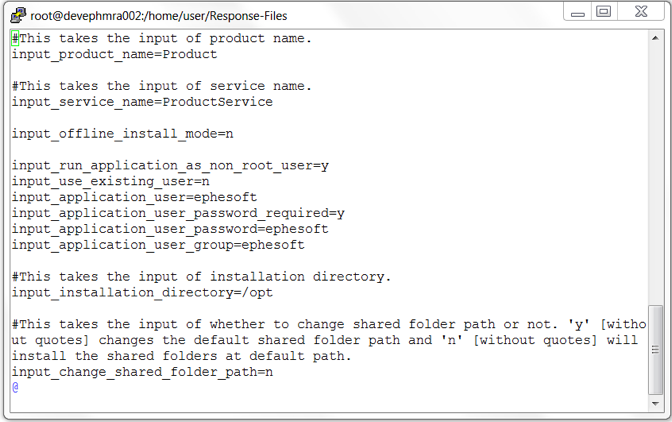
Sample config.properties File for Silent Installation
This section provides you a sample config.properties file which you can use to install all default configurations of product Transact.
1.This takes the input of product name.
input_product_name=Ephesoft
2.This takes the input of service name.
input_service_name=ephesoft
3.This allows you to select between offline and online installation.
input_offline_install_mode=n
4.This takes the input if user wants to run application as non-root user. User can provide new user/existing user details in corresponding parameters.
input_run_application_as_non_root_user=y
input_use_existing_user=y
input_application_user=ephesoft
input_application_user_password_required=y
input_application_user_password=ephesoft
input_application_user_group=ephesoft
5. This takes the input of installation directory.
input_installation_directory=/opt
6. This takes the input of whether to change shared folder path or not. ‘y’ [without quotes] changes the default shared folder path and ‘n’ [without quotes] will install the shared folders at default path.
input_change_shared_folder_path=n
7. If in above switch input_change_shared_folder_path value is ‘y’ then this will act as an input for shared folder path.
input_changed_shared_folder_path=/opt/Ephesoft
8. This takes the input of tomcat port number.
input_tomcat_port_number=8080
9. This takes the input whether to change the server name or not. ‘y’ [without quotes] changes the server name and ‘n’ [without quotes] do not change the default server name.
input_change_server_name=n
10. If in above switch input_change_server_name value is ‘y’ then this will act as an input for server name.
input_changed_server_name=turbo-VirtualBox
11. Placeholder for type of database that will be configured or installed. It is 1 for MariaDB and 2 for Oracle.
input_database_type=1
12. This takes the input of whether to make a new database instance or not. ‘y’ [without quotes] make a new instance of mariadb and ‘n’ [without quotes] do not make a new instance of mariadb.
input_new_database_instance=y
13. For MariaDB database
14. This takes the input of ip name
input_system_ip_name=localhost
15. This takes the input of database user name. In case of multi-server or remote database this value will not be treated as username for the database. Username policy is to contain only alphanumeric characters and underscores. Length must be from 1 to 16. If username policy is overridden by user, it would be user’s responsibility to validate username.
input_database_username=root
16. This takes the input of database port number.
input_database_port_number=3306
17. This takes the input of database password. Password policy is to contain only alphanumeric and _!@#$%^&*?><- characters. Length must be from 1 to 12. If password policy is overridden by user, it would be user’s responsibility to validate password.
input_database_password=turbo
18. This takes the input of database user name for the admin user. This user is for giving special permission so that database (application and report) can be accessible in multi-server environment. Username policy is to contain only alphanumeric characters and underscores. Length must be from 1 to 16. If username policy is overridden by user, it would be user’s responsibility to validate username.
input_admin_database_username=ephesoft
19. This takes the input of database password for the admin user. Password policy is to contain only alphanumeric and _!@#$%^&*?><- characters. Length must be from 1 to 12. If password policy is overridden by user, it would be user’s responsibility to validate password.
input_admin_database_password=ephesoft
20. This takes the input of application database name.
input_application_database_name=ephesoft
21. This takes the input of report database name.
input_report_database_name=report
22. For Oracle Database
23. This takes the input of whether to make a new database schema or not. ‘y’ [without quotes] make a new schema of oracle and ‘n’ [without quotes] do not make a new schema of oracle.
input_new_database_schema=y
input_oracle_database_username=sys
input_oracle_database_password=Passw0rd
input_oracle_database_server_name=localhost
input_oracle_database_port_number=1521
input_oracle_database_sid_service=system
input_oracle_database_application_db_schema=ephesoft
input_oracle_database_application_db_password=Passw0rd
input_oracle_database_report_db_schema=report
input_oracle_database_report_db_password=Passw0rd
input_oracle_database_report_archive_db_schema=report_archive
input_oracle_database_report_archive_db_password=Passw0rd
24. The installation of tesseract is optional. This takes the input whether to install tesseract or not. ‘y’ [without quotes] installs the tesseract and ‘n’ [without quotes] do not install the tesseract.
input_install_tesseract=n
25. This takes the input of whether to use existing shared folder or not. ‘y’ [without quotes] uses existing shared folder and ‘n’ [without quotes] do not use existing shared folders.
input_existing_shared_folder=n
26. This takes the input of existing shared folder path if in above switch input_existing_shared_folder value is ‘y’.
input_existing_shared_folder_path=/opt/Ephesoft/SharedFolders
27. This takes the input of whether to enable database patch or not. ‘y’ [without quotes] enables the database patch and ‘n’ [without quotes] do not enable the database patch.
input_database_patch_enable=y
28. This takes the input of whether to upgrade the application or not. ‘y’ [without quotes] upgrades the application and ‘n’ [without quotes] do not upgrade the application.
input_upgrade_application=y
29. This takes the input of whether to stop the server if it is running during upgrade installation or not. ‘y’ [without quotes] stops the server and ‘n’ [without quotes] do not stop the server and exit the script.
input_forcefully_stop_running_server=y
30. This takes the input of whether to install as a multi-server or not. ‘y’ [without quotes] will install as a multi-server and ‘n’ [without quotes] installs as a single server.
input_install_multiserver=n
31. If in above switch input_install_multiserver value is ‘y’ then this will take the input as a path for mounted shared folder path.
input_mounted_sharedfolder_path=/opt/Ephesoft/SharedFolders
32. This takes the input of license registration details. All details are mandatory.
input_user_registration_name=username
input_user_registration_company=companyname
input_user_registration_department=departmentname
input_user_registration_street=streetname
input_user_registration_city=cityname
input_user_registration_state=statename
input_user_registration_country=countryname
Running Upgrade Installer in Silent Mode
The process for upgrading an installation in silent mode is similar to the process for a full installation in silent mode, except that the config.properties file is much simpler.
Editing config.properties file for Upgrade
You must set the following key properties while perform an upgrade.
| Parameter | Description | |
| input_database_patch_enable | y | Enter y to execute database path. This is required in case of single server installation or database server in case of multi-server environment. |
| n | Enter n not to execute database patch. | |
| input_upgrade_application | y | Enter y to upgrade from an existing Transact version. Upgrade happens if you have an existing lower upgradable version than the version you want to install. |
| n | Enter n not to upgrade from an existing Transact version. | |
Interactive Command Line Installation of Ephesoft Transact on Linux
This section describes interactive command line installation of Ephesoft Transact on Linux.
Prerequisites
Following configuration is required for installing Transact on Linux using command line installer:
- Red Hat Enterprise Linux v 6.8.
- Internet connection is required as some software need to be updated or installed from RedHat’s repository while Transact’s installation.
- Executeble permission must be given to all files present in installer folder by executing following command.
- Navigate to installer directory by executing cd /path to installer
- sudo chmod –R 755 *
- A Transact license must be installed on the machines on which Transact has been installed.
Creating Repository on Red Hat Enterprise Linux/Ubuntu
While performing installation on Red Hat Enterprise Linux in absence of internet access, you need to provide the repository media offline.
To provide repository media offline(RHEL)
- Mount the DVD or ISO file by executing respective comman
a. Use the following command to mount the DVD in DVD drive.
mkdir -p /mnt/dvd
mount -t iso9660 /dev/sr0 /mnt/dvd
This mounts the DVD to /mnt/dvd folder.
b. Use the following command to mount the ISO file present on file system.
mkdir -p /mnt/iso
mount -o loop <path of ISO file>/<name of iso file with extension> /mnt/iso
This mounts the ISO file to /mnt/iso folder.
- Create an offline repository by creating a file at following location: /etc/yum.repos.d/touch /etc/yum.repos.d/rhel-offline.repo
- Edit the above file and add the following content:
[rhel-source]
name=Red Hat Enterprise Linux v 6.8
baseurl=<path of mounted folder>
enabled=1
gpgcheck=0
- Save the file.
- Use the following command to update the changes.
yum update
Offline repository is not setup and ready to be used.
To provide repository media offline(Ubuntu)
Please follow these steps:
- Install apt-mirror this will create a mirror of repository on local system at mentioned location.
sudo apt-get install apt-mirror
- Make a directory where user wants to store offline packages:
sudo mkdir -p /repo
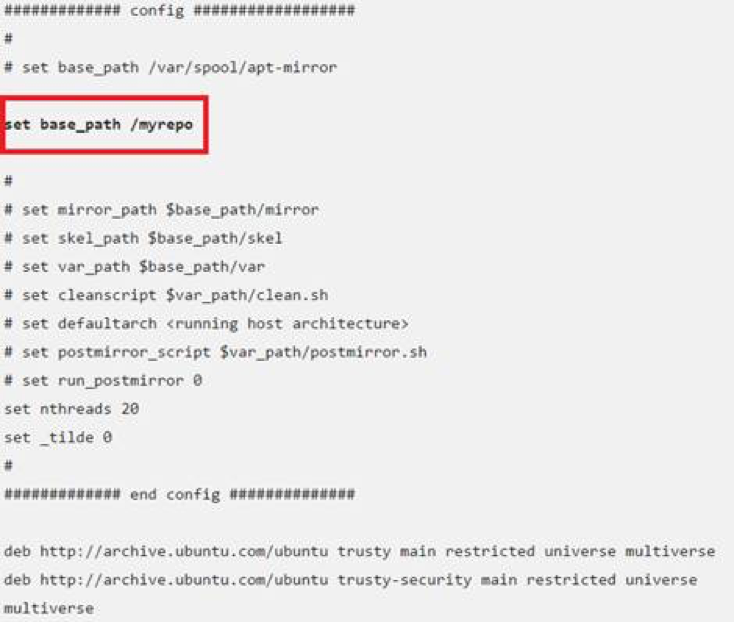
- Now open /etc/apt/mirror.list and add /repo folder as base_path
vi /etc/apt/mirror.list
- Start mirroring the repository by using following command:
sudo apt-mirror
This process shall take some time to complete may be few hours depending on internet speed as this process starts mirroring the repository to /repo folder.
- Edit sources list to make use of downloaded repository files:
/myrepo/mirror/us.archive.ubuntu.cim/Ubuntu/
vi /etc/apt/sources.list
and change path
deb file:///myrepo/mirror/us.archive.ubuntu.cim/Ubuntu/ trusty universe
deb file:///myrepo/mirror/us.archive.ubuntu.cim/Ubuntu/ trusty main restricted
deb file:///myrepo/mirror/us.archive.ubuntu.cim/Ubuntu/ trusty-updates main restricted
- Next updated the sources list by doing
sudo apt-get updated
- Now repository is ready to be used.
Performing Interactive Command Line Installation
This section explains steps to install Ephesoft Transact system and SharedFolders with Oracle database.
To install Transact using interactive command line
- Copy the Ephesoft_4.1.1.0.tar.gz and installation scripts to some path using WINSCP or any other tool.
In the below example, all the required files have been copied to/home/turbo directory.
- Use the command chmod 755 * to grant appropriate permissions to execute the scripts.
- Use the command ./install to start installation.
You are prompted to choose if you wish to install in silent mode.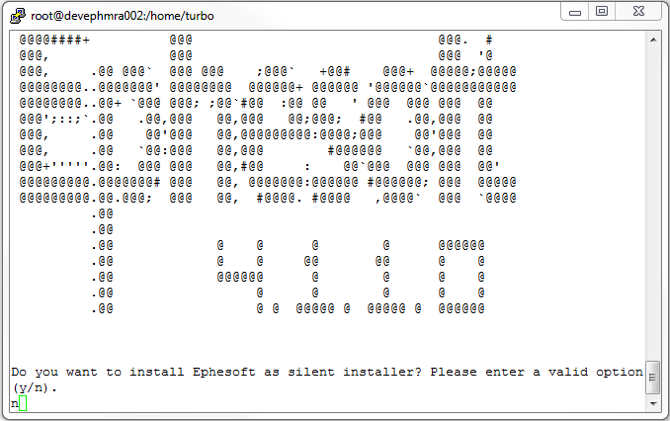 4.Enter n
The installation begins by checking for internet connection and updating package list from repository
You are prompted to choose if you wish to install as a non-root user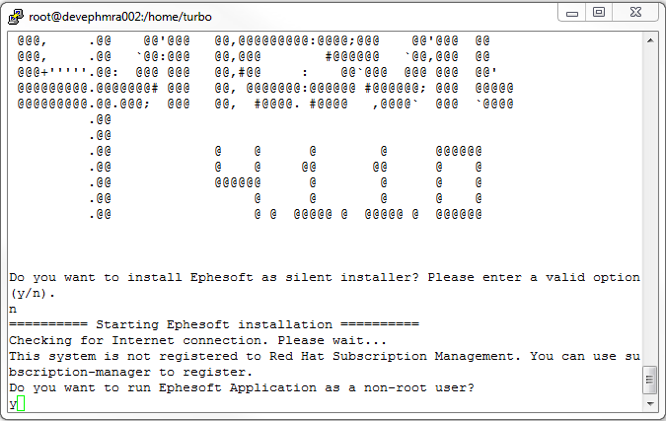
5. Enter y.to perform installation as a non-root user.
You are prompted to choose if you wish to use an existing non-root user.
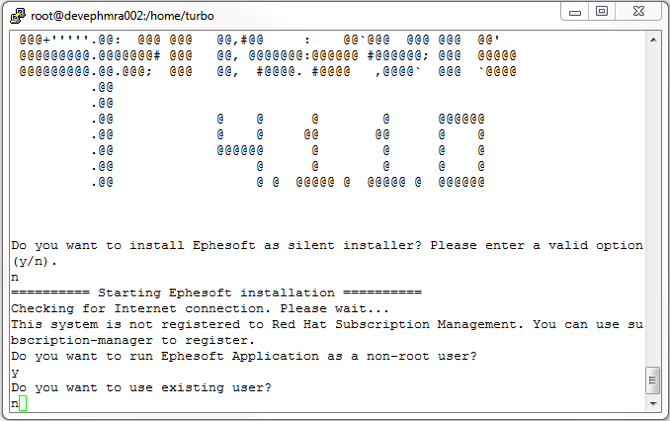 6. To perform installation as an existing non-root user. You are prompted to enter the user name of the existing non-root user.
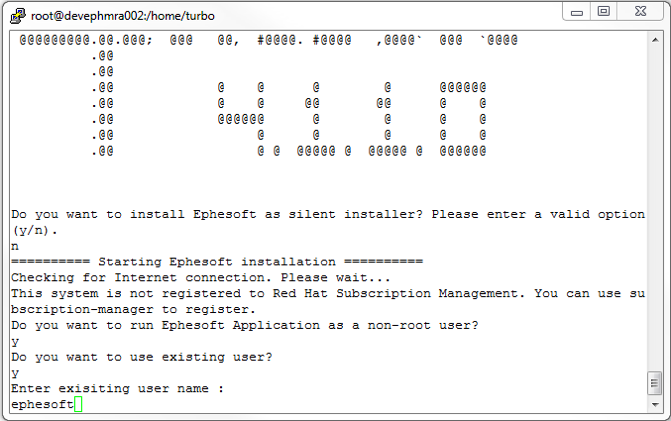 Enter the user name of the existing non-root user with which you want to perform installation.
 7. You are prompted to enter the primary group to which the user belongs.
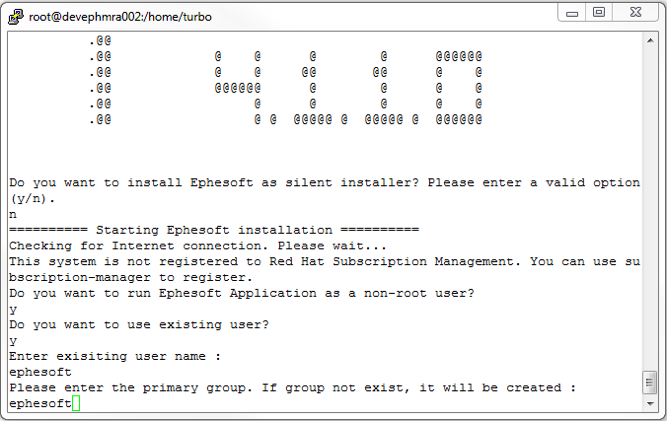 8. Enter the group name to which the user belongs
You are prompted to enter absolute installation path for Transact installation.
9.Enter the absolute installation path for Transact installation.The system now extracts the Transact tar file and copies the Ephesoft folder inside installation directory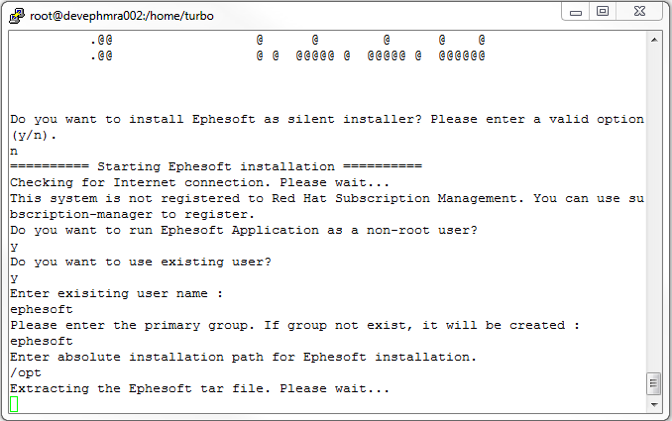
You are prompted to choose if you wish to use existing SharedFolders.
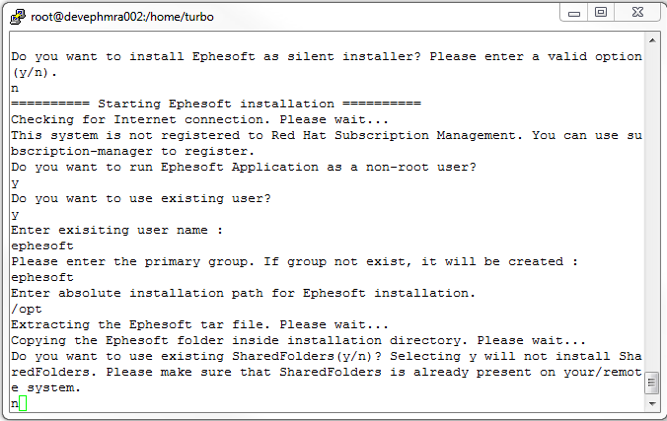 Enter n to install SharedFolders.
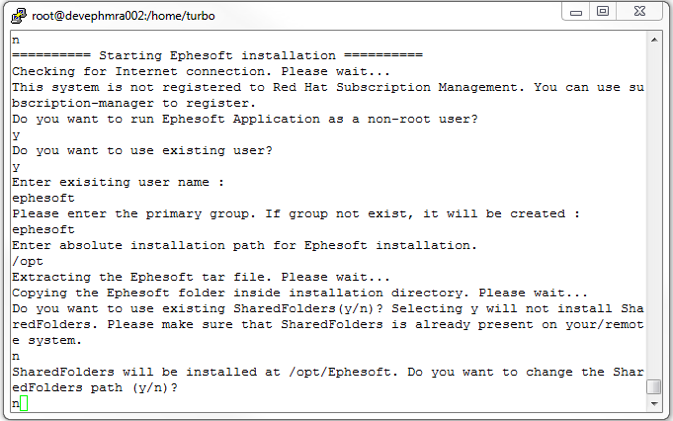 11. Enter y to change the installation path for SharedFolders.You are prompted to enter the port number to run Tomcat server.
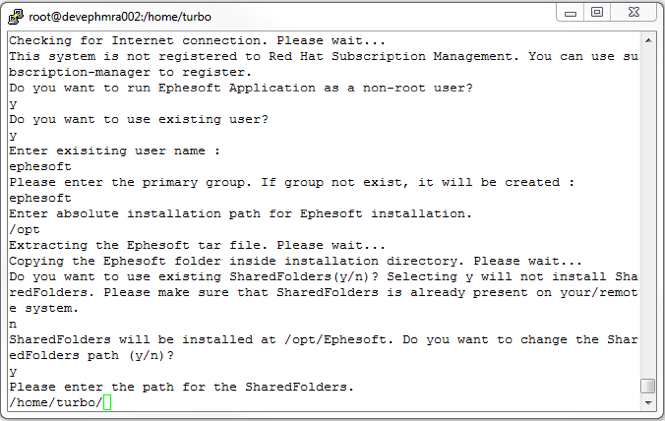
- Enter the path to the required location for installation of SharedFolders.
The system assigns read, write, and execute permissions to the SharedFolders and copies SharedFolders to the required path.
You are prompted to enter the port number to run Tomcat server.
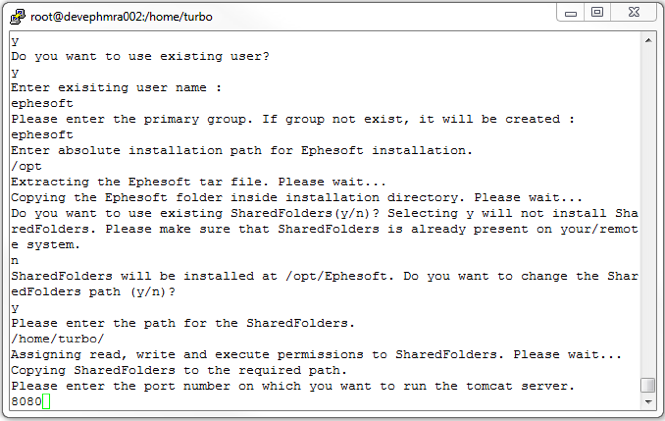
- Enter the Tomcat server port number.
You are prompted to choose if you wish to change the server name.
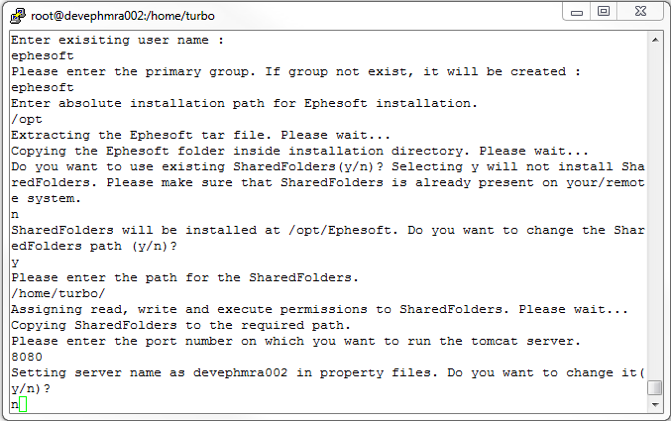
- Enter y to change the server name.
You are prompted to enter the hostname/IP of the server.
- Enter the hostname/IP of the server.
The system updates the properties file with the server detail entered by you and installs/updates various required components.
You are prompted to choose the database type to use.

- Enter 2 to install Ephesoft Transact v4.1.1.0 with Oracle database.
You are prompted to choose if you wish to create new Oracle database schema.
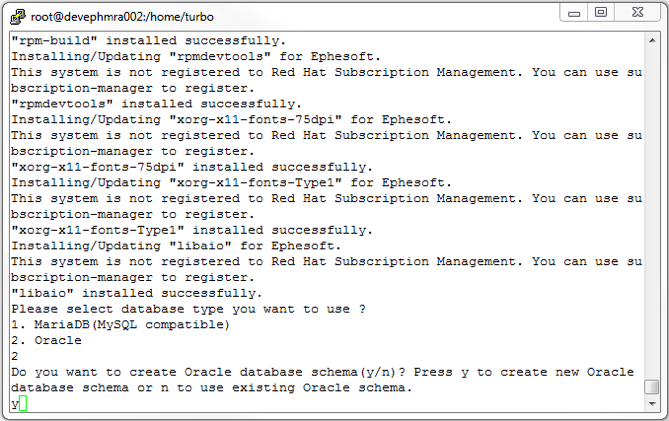
- Enter y to create new Oracle database schema.
You are prompted to enter the hostname/IP of the Oracle database server.
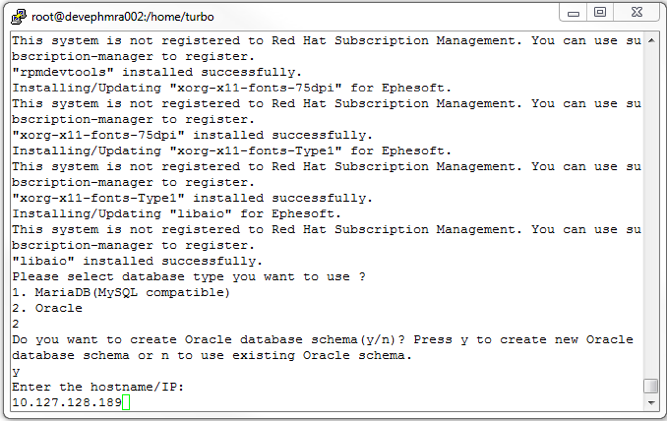
- Enter the hostname/IP of the Oracle database server.
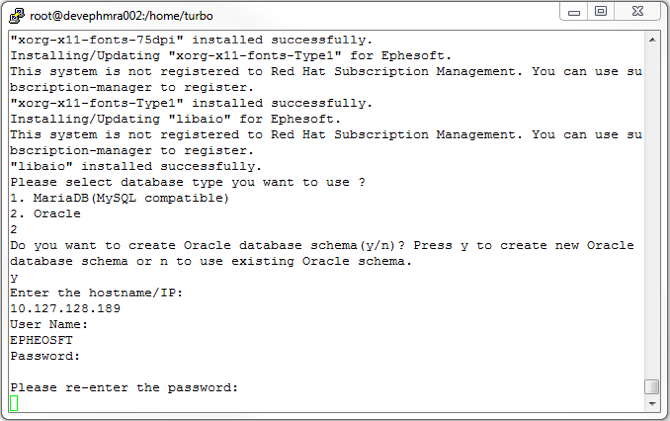
You are prompted to enter the User Name of the user to access the Oracle database server
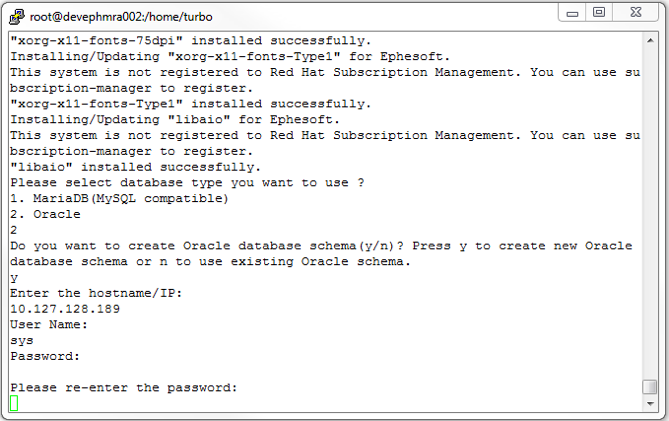
- Enter the User Name.
You are prompted to enter the Password to access the Oracle database server.
- Enter the Password.
You are prompted to re-enter the Password.
- Re-enter the Password.
You are prompted to enter the port number for the Oracle database server.

- Enter the port number for Oracle database server.
You are prompted to enter SID/Service name.

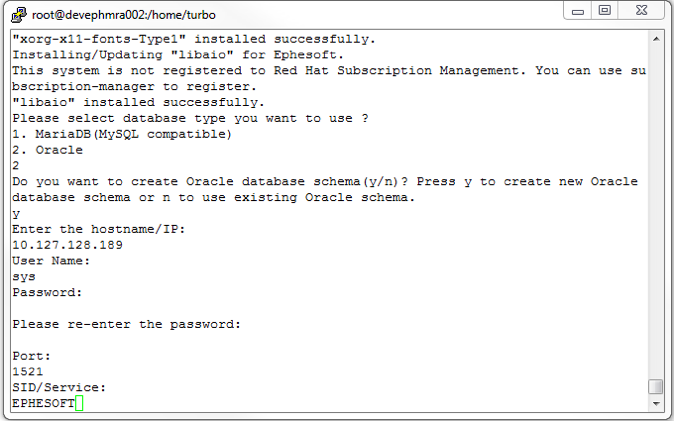
- Enter the Oracle SID/Service name.
You are prompted to enter Application DB Schema.
- Enter Oracle database Transact application username.
You are prompted to enter Application DB Schema Password.
- Enter Oracle database Transact application user password.
You are prompted to re-enter Application DB Schema Password.
- Re-enter Oracle database Transact application user password.
You are prompted to enter Report DB Schema.
- Enter Oracle database Transact report username.
You are prompted to enter Report DB Schema Password.
- Enter Oracle database Transact report user password.
You are prompted to re-enter Report DB Schema Password.
- Re-enter Oracle database Transact report user password.
You are prompted to enter Report_Archive DB Schema.
- Enter Oracle database Transact report archive username.
You are prompted to enter Report_Archive DB Schema Password.
- Enter Oracle database Transact report archive user password.
You are prompted to re-enter Report_Archive DB Schema Password.
- Re-enter Oracle database Transact report archive user password.
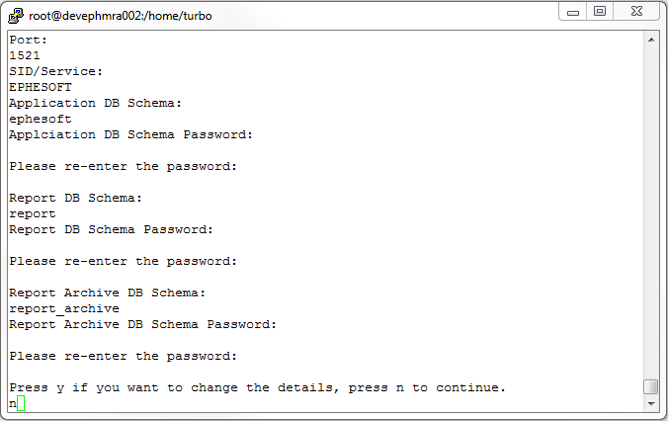
You are prompted to choose if you wish to change any of the entered details.

- Enter n to proceed with installation with the details entered until now.
You are prompted to choose if you wish to execute a database patch.
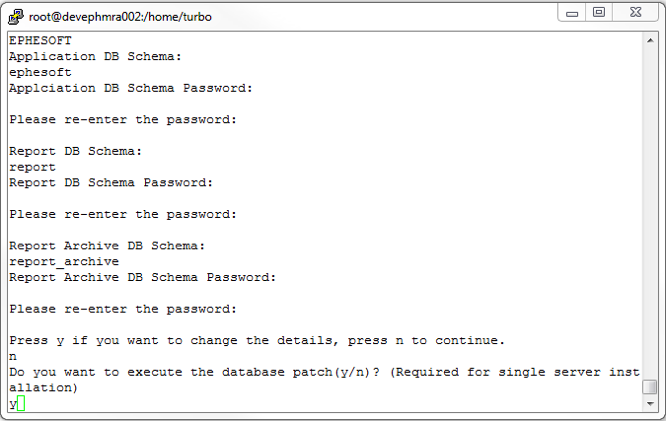
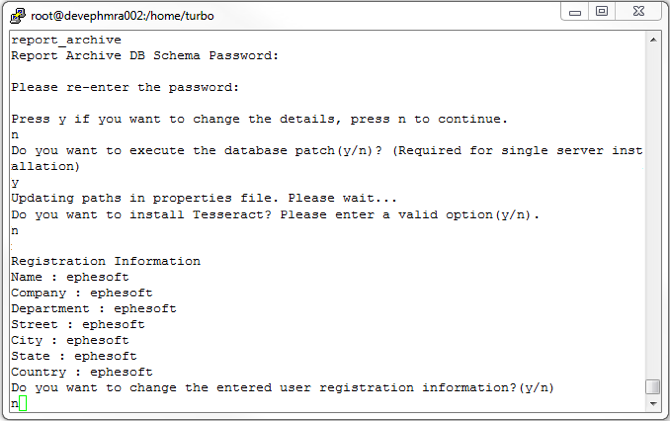
- Enter y proceed with database patch execution.
- The installer will ask if you would like to install Tesseract. Nuance is the preferred OCR engine and is installed by default, however you can also install Tesseract if you would like to use this plugin.
- Enter registration information.
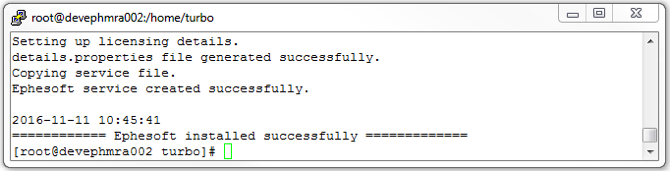
- The installer will continue to install applications used by Ephesoft such as Ghostscipt, ImageMagick, Nuance, and Poco.
- Transact has now been installed on your server.
Refer to Linux Catalina.out gets too big to Open in Text Editors for more information.
- Enter the path to the required location for installation of SharedFolders.